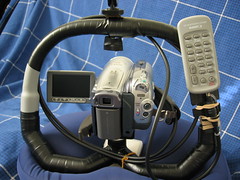
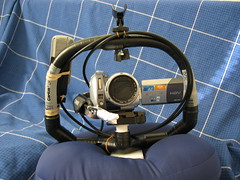
Parts
1 Canon WL-D85 Wireless Controller
1 Toslink optical cable
1 Pack of Sticky Back Velcro
1 Roll of Electrical Tape
1 Plastic fork/spoon/knife (flat handle)
1 Flat plastic/credit card
4 rubber bands
1 strip of aluminum foil
Tools
1 Pair of Scissors
Start by testing the principle. The HV20 sensor is that smoke colored plastic on the lower right side (left if you're looking directly at it) of the lens. Get a fiber optic cable like a Toslink (aka SPDIF optical) cable and line up the HV20's controller with one side of the pickup. Point the other end of the cable at the sensor. You can control the camcorder from behind! The trick is getting the controller and cable to line up. Same thing with the sensor and the other end.
The Controller Mount
I start by cutting up an old plastic card into 2/3 and 1/3 pieces lengthwise. The 1/3 piece is used as a spine and extends out the top by an inch to be a fastener for the cable. Wrap the pieces together with electrical tape.
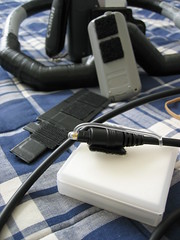
Do a dry fit of the cable and the controller to see how best to line them up. This will determine where to place the sticky velcro. Attach two pieces of the loopy velcro pad to the back of the controller. Put two corresponding pieces on the mount. Dry fit the cable again. Based on where the body of the optical head lies, cut out two tabs on either end of the mount with your scissors. This will be where the rubber bands hold on to the cable.
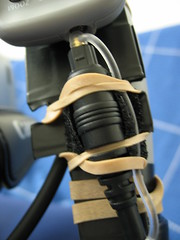
Dry fit with the cable and some rubberbands. The objective is to keep the LED on the controller aligned with the cable head. Knowing its position, remove the rubber band and tape a hook-pad of velcro to the mount. Then wrap the loopy pad to the body of the cable head. Both ends should now line up nicely but the mount tends to flex up and down. You can get a handle from plastic spoon or fork for an extra spine to the mount. This will prevent the mount from flexing the head and LED into misalignment.
Now you have a working controller. Test it by pointing the other end to the camcorder's sensor. We're halfway there.
Mounting the Controller
We'll need to be more creative here depending on what's holding the HV20. A monopod/tripod will have to be setup a bit differently from my figrig type. Use your imagination.
There are a few simple rules to follow. Do not bend the cable sharply or the glass may break. It is flexible and sturdy but not if it gets snapped. Rubber bands make good fasteners. Twisties will do too. Plastic tie-downs will work but be careful when you need to cut them off.
Reflecting the Beam
Keeping the covers to the optical cable helps diffuse the beam. Otherwise it is so narrow you have to be aimed almost perfectly for the sensor to make it work. With the covers on, the sensor will pickup the signal up to 30-degrees off angle when stuck point-blank. Or on angle from about three inches away to the front. Having the cable face the camera may be inconvenient like with my figrig. So I routed mine from beside the camcorder.
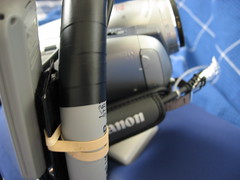
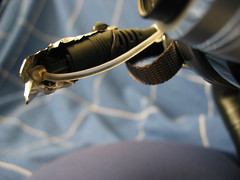
I routed the cable through the handstrap which hangs it at about a 45 degree angle to the sensor. On the optical head I attach some shiny aluminum foil. Crumpled a bit to form a concave mirror it will scatter the beam toward the sensor. This seems to work quite well even if the head moves.
References:
http://www.dvinfo.net/conf/showthread.php?t=16934
