Tuesday, June 22, 2010

Tips for the CMR Blackbird

It took about a week to learn how to fly the CMR Blackbird.   With this post I'll try to list down what I've learned in the hopes it can be replicated by other people.

Learning to Balance
It's like riding a bicycle.  Explanations can only go so far.  It has to be experienced.   But I think I have tips that will get there faster.

  1. Level set your expectations, you are looking for reduced motion.  It might not be perfectly still like a dolly but stable enough not to cause nausea.
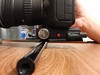
  2. Find your camera's center of gravity by feel.   Put your finger on the bottom and find the place where it least topples.  It's like finding the balance point of a plate with a cupcake on one side.   You can use a pencil under a camera plate to help you find it.
  3. Side to side balance is priority when centering as it will have the most tendency to be visible in footage.
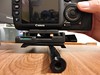
  4. The Blackbird's bubble level isn't very accurate.  My Canon 7D has an electronic level that gives great feedback since its at the very center of gravity.  But that's the only camera I have that has it.   The rest need an external level.  A substitute would be a spirit level designed for the cold/hot shoe.  It's closer to the center of gravity for the camera and should therefore be more accurate than one ones mounted on the corner of a stage. 
  5. The bubble levels are a guide, you need to develop a feel for balance.   When I balance I make it front heavy, then back heavy until I find the mid point.  I have to be patient until I can be instinctive on how close I am to the most stable point.   I do the same for the roll (left-right) component.   Be sure to have the T-Bar extended all the way so the rig will be sensitive.  While it's sensitive it's easier to see if the balance is off since it will teeter.  You may never seen it completely still.  This is fine as YOU can compensate for it with your left hand when you fly.  You can also use smooth touch to cheat.
  6. Drop time of 2 seconds is a good start.   I set my T-bar to 22 to achieve this.   Why 2 and not 1.5?   It's easier to count whole increments that half.   Use a stopwatch or a watch with a seconds hand to time it.  Counting "One Mississippi" may not roll off the same way for everyone.
  7. Trust the Blackbird to do its job.  The rig may seem to teeter constantly, but that does not necessarily show up in the footage.  I've learned that when I see the Blackbird teeter constantly, it's actually compensating against ME!  When I review the footage later it shows shows smooth action.

Stable flight

  1. Wind is the enemy.  Find a way to block a breeze when you can.  If you need to see how easily it can be influenced by wind, set the rig in front of an air conditioner or electric fan.    Outdoor wind may be stronger.
  2. Use two hands.   The left hand should lightly touch the gimbal.  This is the toughest part of learn as you have to discover by yourself just how much pressure is appropriate.   For me I only apply pressure when I want to turn it.  Most of the time I'm just holding it while trying not to get in its way.  See how hard it is to describe?
  3. Use the same shoes when flying.  I have a pair of waterproof Merrel shoes that I take with me everywhere.   The cushion isn't as soft as my Nike cross-trainers but it's the shoe I'm most likely to have on when I'm actually shooting.  You need to get a feel for how the ground affects your step while flying.   Your legs, especially when bent, will absorb a lot of shock that would otherwise transfer through your arm into the rig.   If you keep the same shoes it will be easier to guess if the ground is too hard and you need to step a bit more lightly.

Securing Parts

There are three parts that constantly loosen on my Blackbird that need to be secured.

  1. Tighten the gimbal to the stage.  When I do pan motion or hold the Blackbird between takes I tend to hold it by the neck of the gimbal that attaches to the stage.  This tends to unscrew it thus changing the height of the balance point. 
  2. The lower fastening screw on the T-bar tends to loosen especially after the bar hits something.   Make sure it's tight after picking it back up to use.
  3. The rubber shoe on the resting stand comes off.   Secure it with a tie down.


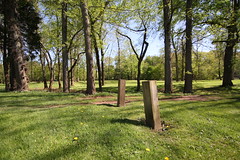
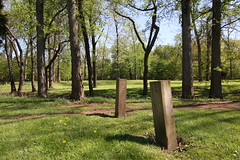
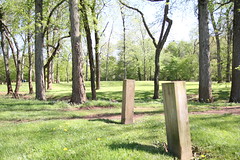
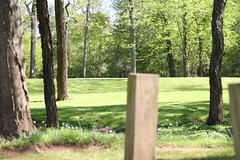
Sample Flights for Reference
I wouldn't call these examples of a perfectly balanced rig but the footage is usable.

Indoors, walking, shot in 24fps


Outdoors, running and walking, shot in 60fps, slowed down to 24fps

Tuesday, June 15, 2010

Editing Canon 7D with Blender 3D

So I went on a trip without my editing rig.  No way was I lugging a quad-core desktop on my trip.   Instead I'll do rough cuts on the field with whatever machine I can borrow.   Unfortunately I had my Vegas and Cineform license information was locked away on a powered-off hard drive half the world away.  Windows Movie Maker wasn't going to cut it.   In comes Blender 2.49 and Super(C) to tide me over.  My purpose was to do rough cuts to see if I had enough footage.

The Super(C) is free software that will let you downgrade the high-bit rate H264 video from the 7D to AVI format with a codec of your choosing.  I selected and IPod-like format: MP4 with 6Mbit in AVI format at 480x272.

Tutorial on how to use Blender as an NLE
http://screencasters.heathenx.org/_misc/bve/bve_01.html

Switch to Sequence Editor
-> (upper bar) SR:4-Sequence (default is SR:2 - Model)
Set Clip settings
-> Format (lower right) -> change to whatever size you want to edit (there are presets like HD and FULL on the right) -> FPS: (change to 24, 25, 50 or 60)

Load a video
-> (middle-timeline window) -> use scroll wheel to unzoom the timeline (timeline is in frames) Shift-A -> Movie+Audio (HD -- stands for Hard Drive not High Definition) ->  Search for your clip on the hard drive -> Drag the icon to the frame marker you want -> Audio track is above Video, may not synch if FPS is wrong

Undo a grab or any operation
Esc(ape)

Grab video (to move clip around)
Shift/Right-Click (to select track),G -> drag the clip around -> the left side is the leading frame count

Cut a clip
Use arrow keys or left-mouse button to scrub the green vertical bar to scrub to the point you want to cut -> Shift/Right-Click (to select video track) -> Point to right-facing arrow at beginning to track  (or left-facing if cutting from end of clip) -> G -> Drag left or right to the green vertical bar you previously set -> Left-click to set

Cross-Fade Transition
Right-Click (to select track) first video that is the start of transition -> Hold down Shift -> Right-Click (to select track) of second video -> Shift-A -> Gamma Cross -> drag the gamma cross transition to a track number above the two clips

Change Last Frame
The third window down defaults to 256 (frames), change this to the number indicated on the last clip on your timeline so you can display the entire movie

Save Project
File -> Save -> Navigate to directory you want -> rename untitled.blend to any name you want -> Save As

Output to Movie
Change Q (Quality) from 90 to 100, Change format from JPEG to FFMPeg (or whatever format you want) -> Video -> Choose the Codec (MPEG-2 by default, H264 is available) -> Audio -> Downsample Mix -> Output: Change the output directory from /tmp to wherever -> Do Sequence -> ANIM -> Wait for the Animation to finish

Take note how I use the word Animate.  There is a Render button in Blender.  It serves a different purpose from our normal NLE nomenclature.    In Sony Vegas we say Render.  In Blender it is ANIM(ate).

Thursday, April 29, 2010

Behaviors of SLR Lenses on Canon APS-C

Field of View
Comparison of the field of view you get at various focal lengths and lenses. It's easier to visualize with pictures. The camera is a Canon Rebel T2i (aka 550D) which has an APS-C sensor (1.6 crop factor). Camera is tripod mounted while lenses are changed. Sorry, I forgot to take "normal" range photos with the zoom. I'll do a second set of tests for that. These still images are at 4:3 Aspect Ratio. Video mode will crop the top and bottom to form a 16:9 image.

11mm (17.6mm effective)
Tokina 11-16 AT-X Pro 2.8 (Zoom)
16mm (25.6mm effective)
Tokina 11-16 AT-X Pro 2.8 (Zoom)
18mm (28.8mm effective)
Sigma 18-50 EX DC Macro 2.8 (Zoom)
50mm (80mm effective)
Sigma 18-50 EX DC Macro 2.8 (Zoom) 
50mm (80mm effective)
Nikkor SC 50mm 1.4 (Prime), adapted from F-mount to EF
Note how the view is narrower than the Sigma above.  Infinity focus is slightly before the infinity marker on the lens.
70mm (112mm effective)
Canon EF 70-200 F2.8/L IS (Zoom)
85mm (136mm effective)
Canon EF 85mm 1.8 (Prime)
200mm (320mm effective)
Canon EF 70-200 F2.8/L IS (Zoom)


Focus Breathing
A slight change of FOV may be observed when changing focus.  All the SLR lenses from the previous test exhibit this to some degree.

Focused to Foreground
Note the trees on either side of the picture.  Focus to foreground which is about 9 feet away shows less of trees on either side.  Lens is a Canon EF 70-200 F2.8/L IS at 70mm.

Focused to Background
Focus to background shows more of the trees on either side.  Lens is a Canon EF 70-200 F2.8/L IS at 70mm.


Lenses Tested
Tokina 11-16MM F/2.8 ATX 116 Lens for Canon EOS AF Digital - Tokina ATX116PRODXC (paid link)
Sigma 18-50mm f/2.8 EX DC SLD ELD Aspherical Macro Lens for Canon Digital SLR Cameras (paid link) 
Canon EF 85mm f/1.8 USM Medium Telephoto Lens for Canon SLR Cameras (paid link) 
Canon EF 70-200mm f/2.8L IS USM Telephoto Zoom Lens for Canon SLR Cameras (paid link) 


Canon 7D vs T2i Video Mode Controls

The controls behave differently between stills and video mode. This is for video mode.

Switch to Video Mode
T2i
Turn mode dial to movie icon. Message appears if adapted lens is attached. Mirror locks up, LCD or external monitor turns on. Push Live View button on camera's back to record. Red circle appears in upper right when recording.

7D
Push throw switch left to movie icon on camera's back. Message appears if adapted lens is attached. Mirror locks up, LCD or external monitor turns on. Press Start/Stop button to record. Red circle appears in upper right when recording.


Changing Video Shutter Speed
T2i
Turn wheel near shutter button right to increase shutter speed. Recommended shutter speed is 50 (1/50) for 24fps, 60 (1/60) for 30fps, and 120 (1/120) for 60fps. This is to conform to 180-degree shutter rule.

7D
Turn wheel near shutter button right to increase shutter speed. Recommended shutter speed is 50 (1/50) for 24fps, 60 (1/60) for 30fps, and 120 (1/120) for 60fps. This is to conform to 180-degree shutter rule.

Changing Aperture of EF Lenses
T2i
Hold down AV button near LCD. Turn wheel near shutter button right to increase F-stop (darker). Turn left to decrease F-stop (brighter).

7D
Turn body dial right to increase F-stop. Turn body dial clockwise to increase F-stop (darker). Turn counter-clockwise to decrease F-stop (brighter)

Changing ISO (boost brightness)
T2i
Press ISO button once near shutter button. Turn wheel near shutter right to move from Auto ISO, 100, 200 ... 6400 (default, extended ISO turned off). LCD displays ISO value in lower right corner. Selection wraps around.

100-400 ISO typical for daylight. 1600 indoors starts to show image noise. Default Max setting is 3200 for Auto ISO.

7D
Press ISO button once near shutter button. M-Fn wheel near shutter right to move from Auto ISO, 100, 125, 160, 200, 250 ... 6400 (default, extended ISO turned off). LCD displays ISO values. Selection wraps around.

100-400 ISO typical for daylight. 1600 indoors starts to show image noise. Max gain in Auto ISO feature is not available on 7D. Maximum Auto ISO is 6400 when high mode is not enabled.

Saturday, April 10, 2010

GoPro HD Hero nuts

The HD Helmet Hero doesn't have a nut to go with every mount. My Google searches misled me at first. 10-32 is NOT the correct size. It's Metric 5mm. At Home Depot you can find it in the red trays marked Hex Nut 4-12mm size. You want the one marked HEX NUT 5mm-8 which contains 2 pieces. It was $0.41 + tax at the time of this post.

Friday, March 26, 2010

Fake slow motion


What Remains

This video won Vimeo's Weekend Project in late January 2010. The project was to make "fake slow motion" where it's the actor moving slowly while the shot is rolling at normal speed. To pull off the illusion required some thought and planning.

Seven Factors for success:
1) A tripod
2) Slow but fluid motion of the actor
3) No extraneous background movement
4) Accent special effects
5) Appropriate sound
6) Cuts every three seconds
7) Appropriate story

Tripod
A stable shot is important. The tripod is the easiest tool to work with in this case. The video was shot at 24 fps. Camera motion is more apparent at lower frame rates. I made sure the wind wouldn't shake the camera. Also be careful to avoid placement near foot traffic. Where possible I turned on the IS feature on my lens.

Slow but Fluid Motion
You need to select comfortable positions and motions. Shots standing still while turning were the easiest to do. Just don't blink. Literally, don't blink! That ruins the illusion. The hardest part of this video was slowing down the opening of the box. It tended to spring on its own. You'll also have to factor where the camera will be for the shot. In this case it was between the arms which did not help.

No Extraneous Background Movement
Indoor scenes are easiest because you can control the environment. For outdoors you have to watch what's behind you. In this video there were people taking dogs out for a stroll. The wind also picked up on occasion. I had to wait for the environment to be right before shooting. Multiple takes are important.

The 7D helped thanks to the shallow depth of field. I opened up the aperture to its widest and framed the shot to limit the distractions. For this video I used a Sigma 18-50 EX Macro F2.8 for the indoor scenes. I used manual focus mode to fix the area in focus. Outdoors was shot mostly with a Canon 70-200 F2.8. I had to mind the minimum distance to get the shots I wanted.

Accent Special Effects
The special effects were made with effects of Sony Vegas 8. Here are the important ones.

Tie in the Wind
I drew a red trapezoid with a dithered fill using MS Paint. Then I deleted the background in Paint.NET. The image was saved as a PNG file with alpha channel. This was imported into its own track in Sony Vegas. I turned on track motion and applied a warp effect to the image. I animated the wave and tweaked it until I got a smooth flutter motion. The track motion was important to keep one end of the tie fixed on the neck. Take note that the real tie was tucked behind the collar under the suit for this shot. To sell the illusion the shirt front has to be bare.

I came to the idea of the fluttering tie while I was thinking of things that would look cool in slow motion. You know how superheroes are shown with capes flying in the wind. Why not a tie? With the animated tie the faked slow motion is complete.

The Bird
Same idea as above but implemented differently. I had one still photo of a pigeon from a while back. I manually edited components of the still into two three key frames of the bird. Then I put it into the timeline with some overlaps. Sony Vegas interpolated the frames with overlaps which gave me extra effects. I animated the track to give it some movement.

Rain
I wasn't too happy with the fake rain. Controlling its motion was hard and it didn't quite work. If I knew Blender I would have animated some particles. Since I didn't I settled with this technique I learned from Youtube.

Appropriate Sound
I cut out the original sound entirely. The ambient noise would not have synced to what the video portrayed.

Cuts every Three Seconds
This is just my style. To keep the story moving without being too hurried I used three seconds between cuts.

Appropriate Story
Slow motion, real or fake, is easier to believe for two kinds of story plots: heroism and tragedy. That's just my opinion. Okay, so maybe it's also good for comedic effect. But that would be good for maybe one shot.

Thursday, January 21, 2010

Where to get stock music

I bought Cinescore until Sony pulled the product. Since its library is so limited I started looking elsewhere. So far the only other good source I've found is Stock20. Thank you guys at DVInfo for the tip. The license agreement is quite generous in terms of use. I got mine half off thanks to a fund drive they were running. The special offer arrived by email after signing up for notification.