Showing posts with label Nikon. Show all posts

Wednesday, November 12, 2008

YSM35B Building the Vibrating Mount Part 1

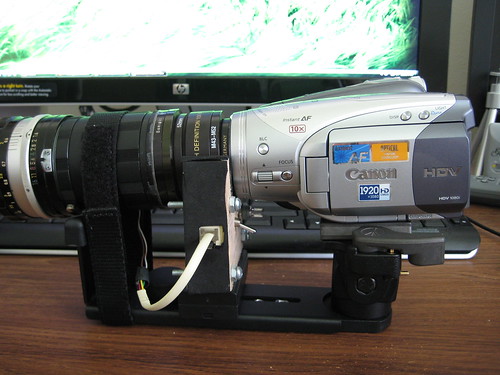
This is the second in the series of instructions on how to build the YSM35B Vibrating 35mm DOF Adapter. You should have modified your Asian Macro Tube to have a 58mm thread by now.


Building the Vibrating Mount
This is the core of the adapter so there will be more detail. The main parts and tools needed:

Canon Ee-A focus screen
3pcs syringe plungers (type used for insulin)
Hot glue gun with sticks
Mechanical Pencil
Plastic card
Scissors
Box cutter or any sharp blade
Metric Ruler
2 solid core wires
Vibrating motor
Drill
Soldering Iron


The Theory
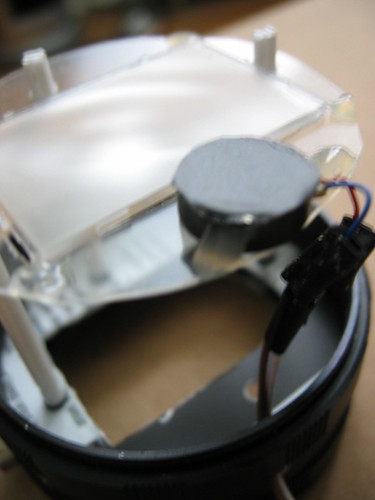
Before we begin lets get some background out of the way. A 35mm adapter needs a condenser and ground glass. In our case the Canon Ee-A focus screen is both in a small package. This tiny piece of plastic has a matte side and a more transparent side. The matte side is what we will use as the ground glass. This side faces to the back of the adapter. The other side is a fresnel pattern that faces to the front. It serves as a condenser, not a great one but better than nothing, to capture the light from the 35mm lens to brighten it up on the ground glass.

Normally, the ground glass needs to be held 46.5mm away from the F-mount on the adapter. But the fresnel piece changes the optics a bit so it should be closer by a few millimeters. We'll adjust this by eye later. If you have access to a collimator then good for you. If you could build one then I applaud you!

Assuming the distance of the focus screen is right, the 35mm lens set on infinity should have a sharp picture for far away objects. This would mean the focus marks on the lens would be fairly accurate as well.

With the above parts this is a static adapter. For daylight this is usually fine with fast lenses. The more you stop down on the lens the grain on the focus screen becomes more visible. There are ways to blur this out in software or you could eliminate this with hardware. To remove the grain you could oscillate or rotate the ground glass. In our case we will use a small vibrating motor to oscillate it.

What's next?
We'll start cutting our initial static mount in the next post.

YSM35B Asian Macro Tube to 58mm Thread

This is the first in the series of instructions on how to build the YSM35B Vibrating 35mm DOF Adapter based on the parts lists of the YSM35(A). The build will be nearly the same except I'll be using a 58mm Opteka HD^2 Macro plus a smaller power pack.

At the end of this series you will know how you could build one yourself. Or know enough about how one is built to diagnose problems with your existing adapter.


Putting a 58mm Thread on the Nikon Macro Tube
For this part we'll recap how to modify an "Asian Macro Tube" with Nikon F Mount to have a standard 58mm filter ring. You will need the following items:

Asian Macro Tube with Nikon F-mount
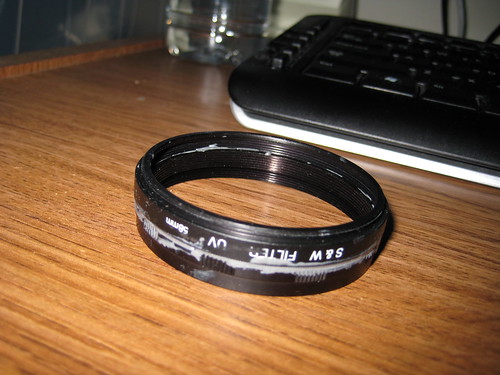
58mm UV Filter
Two Part Epoxy (e.g. JB Weld)
2 Flat Head precision screw drivers (or a drawing compass)
Paperclip
Plastic Card
Isopropyl Alcohol


Use a non-slip pad to remove the glass from the UV filter. We only want the ring to convert the 57mm tube to 58mm. Use the two screwdrivers or compass (the drawing tool not the magnetic direction finder) to twist the inner ring counterclockwise. Applying downward pressure helps. This will unfasten the ring. Once you have it out remove this retaining ring and the glass.


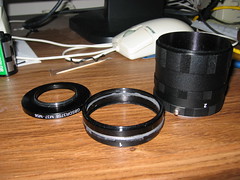
Take the Asian Macro and find the "1" ring. Set the rest side. You can discard the ring with the bayonet mount. Clean both the filter thread and the "1" ring with isopropyl alcohol. Set aside.

Mix the two part epoxy on a piece of carton or paper with a paper clip. JB Weld is good. There is a white and black tube. The black one is harder to get the contents out. You will get a grey goop. Apply the goop to the rear thread of the "1" ring. Make sure to have some all around. Then stack the 58mm filter on top of this. The epoxy may get squeezed out on the sides and the inside between the threads.

Press and hold for a few seconds. While the goop is still soft use the plastic card to scrape the excess from the outside. Inspect the front inner thread of the "1" ring and the rear outer thread of the 58mm filter. Clean out any goop on it. Allow this to cure for 24 hours. It will cure faster in warm weather.

Why did we do this?
The Asian Macro tube is the body for the adapter. The ones off Ebay were 1mm too small. We need a standard 58mm thread to attach a macro, circular filter, and 43mm to 58mm step up ring later.


What is next?

The next post will be about how to build the vibrating mount.

Saturday, April 14, 2007

Converting a 57mm Macro Tube to a 58mm

To convert my macro tube I elected to use spacer 1. To prepare the pieces the spacer was cleaned with soapy water then dried. Same for the filter ring after the glass and retainer were removed. Once dried I started mixing the two part epoxy. I used JB Weld for its strength and 15 minute setting time. Anything from 15 to 30 minutes is good. The faster epoxies tend to become brittle especially with exposure to sun. And never use cyanoacrylate glue such as Super Glue/Mighty Bond/Krazy Glue. The fumes from this glue is the same used by forensic investigators to lift fingerprints from evidence. Keep those away from optics.


The finished product ready to accept 58mm


The epoxy will be a soft goop but shouldn't run. Make sure its as close to a 1:1 ratio. Now apply the epoxy with a disposable blade or a credit card to the male thread of the spacer. Apply a small amount to the inner thread of the filter. Be careful not to get any on the inner thread of the spacer and the rear thread of the filter. Use a stable surface to put the two together. Press and turn to even it out.

Epoxy will probably be spilling out the inside and the side. Use a blade or credit card to scrape the excess out. If any get on a thread, use a wet towelette or your fingers to wipe (make sure you wash your hands before eating!). On a stable flat surface, hold the assembly to the light to make sure they are lined up. Cleaning may protrude part of the filter outside of the spacer's ring. Just push slightly in whatever direction to adjust.

Set the assembly aside in a warm undisturbed place overnight. After the setting time has elapsed it's ready.