I'm on a plane twice a week taking me away from home most of the year. And home is where the desktop I use for editing resides. I can't lug my desktop with me where I go and I can't stay home otherwise I'd be out of a job. So for years I've been on a look out for a laptop that can handle current generation editing and effects software. It's the only way I can pursue my hobby in the field on my off time.
Enter the Lenovo Thinkpad W520 mobile workstation. With a name like that it builds confidence and doubt at the same time. I've had Thinkpads in my hands for work before but I've never previously considered them for personal use. Why? They're sturdy, reliable, unsexy, expensive for the features and ubiquitous in a business setting like a Ford Taurus in a rental car lot. My preconceptions had the names Sager/Clevo, MSI, Alienware and XPS firmly embedded. In fact I had considered all those brands before pulling the trigger on this laptop. But after reading various reviews I was firmly convinced this was the way to go.
My Situation
My home editing rig is a custom ordered HP Elite 380t with a Core I7-930. I bought it through Costco with 12GB of RAM installed. This configuration was meant to run Sony Vegas Pro 10 and Adobe Production Premium CS5 with a variety of footage coming from Canon DSLRs, GoPro HD and Vixia HDV cameras. Adobe After Effects is the most resource intensive application I use. The tracking and rotoscoping features were simply important for the videos I produce. And boy does this application eat RAM. At 12GB it was painfully slow to run through the rotoscope. After two months I upgraded the unit to its maximum 24GB. And to use more than 16GB of RAM I needed to upgrade Windows 7 x64 from Home Premium to Professional. Wow, now I'm a professional? Anyhow I was happy editing footage with this rig. Unfortunately it's not portable. My software licenses allow use of a second non-concurrent copy but I'm not happy installing/uninstalling it on borrowed hardware. I even tried sending an older Q6600 machine ahead of myself just to use Sony Vegas but it wasn't a complete solution. It's quite rare at the moment, maybe not so in a few years, to find a friend or relative equipped with more than 2GB of RAM and a quad core. So I still had to wait a few weeks until I got home to even begin the VFX. And remember, this is my hobby not my job. I have to snatch time here and there to work on it. More often than not the stars don't align. This makes me sad. But the good news, I received some cash which I would happily apply to this hobby. Hey, this could only have a positive effect on my overall well being thus enhancing the net value I can deliver to the customers.
The Choice
The Dell XPS 15 was my original choice. The Sandy Bridge i7 at 2.0Ghz would have been not to far below the i7 930 on my desktop. Off and on, a matte 1080p display would be available. The size was just right for my backpack and its airport weight was acceptable. The problem was it could only take 8GB of RAM on 4GB sticks. 8GB SODIMM aren't generally available yet. I could wait for that "perfect time" in the future but I've got an event coming in a few months. And there's the preparation time for any new rig.
When I started to look more at specifications I gravitated towards the MSI GT680R and Sager NP8150. Unfortunately, the MSI had a glossy screen and was thicker than would fit in my backpack. It was possible to get a custom matte screen from Xoticpc but it didn't solve the rest of it. I visited Fry's twice just to see if I could warm up to it. The Sager NP8150 looked like a nice balance for what I needed. My only misgiving was I couldn't find a store where I could see and touch a model. The specifications could only tell me so much. And the stated weight! It's a desktop replacement for sure. With my dual laptop traveling scheme I'd have to sacrifice my running shoes to carry it with me. I don't know about you, but a good pair of shoes is important too.
Of course would also be looking at the price. The Dell had the size and price wasn't too bad but not the specs. The MSI had the specs and the price was pushing it but not the size. The Sager was an unknown for size and the price definitely broke the bank. I was about ready to give up. Then I saw a post in DVInfo about a Sony Vegas user with a Lenovo W520. Business-class laptop!? I hadn't made the mental transition towards HP Elitebooks, Dell Precisions and Lenovo Ws. My image of them has always been big, heavy and too expensive for the features. What I hadn't considered were discounts!
There is a wonderful thread in notebookreviews.com on the W520. There are even tips on how to maximize your discounts. If you own IBM stock you were eligible for SPP. If you worked or had a friend at IBM and/or Lenovo you could get in with EPP. I had the fortune of working for a supplier to IBM so was eligible for the partner discount. It wasn't as extreme as the other discounts I saw on the thread but it was close enough. So one faithful sleepless night in a state far far away I opened the partner link to Lenovo and ordered the 4270-CTO.
1 4270CT CONFIGURED SYSTEM
0A68541 SBB ICI7-2720QM
45M3090 VBB GENUWIN7PROFES.64
0A68625 SBB GW7P64 E
75Y0162 SBB M W7 XP MD- E
0A68535 SBB 15.6FHD (1900 X 1080) LED
0A68894 SBB NVQ2000M GR
45M4572 VBB 4GBPC3-10600DDR3 1333SODMM
45M4839 SBB KEYBOARDUS ENGLISH
0A68526 VBB FINGERPRINT READER
0A68558 SBB 720P HD CAM INT MICR
0A69620 SBB I RAID-NOT EN
0A68553 SBB 500GB HDD7200RPM
0A68547 SBB DVD RC8XMXDLLRULTEHATA
0A68529 VBB ECS+4IN1CR
45M4816 SBB 9CELLLI-ION BATTERY
0A68904 SBB CPNAMLC+ 170W AC AD
0A68261 SBB BLUETOOTH 3.0
75Y1724 SBB THINKPADB/G/N
44C7950 SBB INT WRLSSWDAREANTWRK UPGR
0A68564 SBB LANG PCK US E
0A68537 SBB FINGRPRNT READER
41C9338 3YR ONSITE + 3YR TPP
I didn't know if I wanted RAID but I knew I'd need to read/write Blu-Ray disks later. Blu-Ray was not an available option but could be purchased aftermarket. If I need extra storage capacity I always traveled with external hard drives. The USB 3.0 and e-SATA ports had me covered. For going all internal I could swap out the burner with an 12.7mm ultrabay caddy. The one complaint I have with the W520, which I learned too late, is that RAID isn't available in the BIOS unless ordered from the factory. But it has a 95% Color Gamut which is supposedly NTSC. That sort of makes up for that disappointment. There was a colorimeter option but I skipped it to get an external one I could use across PCs. And there was the little mSATA option. This would let me have an SSD boot drive and HDD for storage. The W520 is about the size of the T520 which one of my coworkers had. I could see it everyday and compare it to the T410 I already use. This would work!
On to Part 2
Monday, May 16, 2011

Sunday, April 3, 2011
Voiceover Tips
Microphone Placement
Don't point the microphone directly into the mouth but keep it as close as possible. Use your hand to feel in front of the mouth how far you can feel the air from your mouth goes. Just at the periphery of this, usually either left or right of your mouth, is the best place to position the microphone.
Background Noise Removal
I use Audacity because its free and lets me use someone else's computer to edit. It has a noise removal filter that works great for removing background hum.
Editing Format
WAV is the way to go when integrating with Sony Vegas. It saves on the hiccup and loss from using MP3s. The projects themselves I keep in AUP for when I need to go back and redo a portion of the voice over.
Don't point the microphone directly into the mouth but keep it as close as possible. Use your hand to feel in front of the mouth how far you can feel the air from your mouth goes. Just at the periphery of this, usually either left or right of your mouth, is the best place to position the microphone.
Background Noise Removal
I use Audacity because its free and lets me use someone else's computer to edit. It has a noise removal filter that works great for removing background hum.
Editing Format
WAV is the way to go when integrating with Sony Vegas. It saves on the hiccup and loss from using MP3s. The projects themselves I keep in AUP for when I need to go back and redo a portion of the voice over.
Tuesday, June 22, 2010
Tips for the CMR Blackbird
It took about a week to learn how to fly the CMR Blackbird. With this post I'll try to list down what I've learned in the hopes it can be replicated by other people.
Learning to Balance
It's like riding a bicycle. Explanations can only go so far. It has to be experienced. But I think I have tips that will get there faster.
Stable flight
Securing Parts
There are three parts that constantly loosen on my Blackbird that need to be secured.
Sample Flights for Reference
I wouldn't call these examples of a perfectly balanced rig but the footage is usable.
Indoors, walking, shot in 24fps
Outdoors, running and walking, shot in 60fps, slowed down to 24fps
Learning to Balance
It's like riding a bicycle. Explanations can only go so far. It has to be experienced. But I think I have tips that will get there faster.
- Level set your expectations, you are looking for reduced motion. It might not be perfectly still like a dolly but stable enough not to cause nausea.
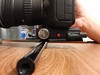
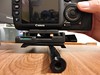
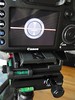
- Find your camera's center of gravity by feel. Put your finger on the bottom and find the place where it least topples. It's like finding the balance point of a plate with a cupcake on one side. You can use a pencil under a camera plate to help you find it.
- Side to side balance is priority when centering as it will have the most tendency to be visible in footage.
- The Blackbird's bubble level isn't very accurate. My Canon 7D has an electronic level that gives great feedback since its at the very center of gravity. But that's the only camera I have that has it. The rest need an external level. A substitute would be a spirit level designed for the cold/hot shoe. It's closer to the center of gravity for the camera and should therefore be more accurate than one ones mounted on the corner of a stage.
- The bubble levels are a guide, you need to develop a feel for balance. When I balance I make it front heavy, then back heavy until I find the mid point. I have to be patient until I can be instinctive on how close I am to the most stable point. I do the same for the roll (left-right) component. Be sure to have the T-Bar extended all the way so the rig will be sensitive. While it's sensitive it's easier to see if the balance is off since it will teeter. You may never seen it completely still. This is fine as YOU can compensate for it with your left hand when you fly. You can also use smooth touch to cheat.
- Drop time of 2 seconds is a good start. I set my T-bar to 22 to achieve this. Why 2 and not 1.5? It's easier to count whole increments that half. Use a stopwatch or a watch with a seconds hand to time it. Counting "One Mississippi" may not roll off the same way for everyone.
- Trust the Blackbird to do its job. The rig may seem to teeter constantly, but that does not necessarily show up in the footage. I've learned that when I see the Blackbird teeter constantly, it's actually compensating against ME! When I review the footage later it shows shows smooth action.
Stable flight
- Wind is the enemy. Find a way to block a breeze when you can. If you need to see how easily it can be influenced by wind, set the rig in front of an air conditioner or electric fan. Outdoor wind may be stronger.
- Use two hands. The left hand should lightly touch the gimbal. This is the toughest part of learn as you have to discover by yourself just how much pressure is appropriate. For me I only apply pressure when I want to turn it. Most of the time I'm just holding it while trying not to get in its way. See how hard it is to describe?
- Use the same shoes when flying. I have a pair of waterproof Merrel shoes that I take with me everywhere. The cushion isn't as soft as my Nike cross-trainers but it's the shoe I'm most likely to have on when I'm actually shooting. You need to get a feel for how the ground affects your step while flying. Your legs, especially when bent, will absorb a lot of shock that would otherwise transfer through your arm into the rig. If you keep the same shoes it will be easier to guess if the ground is too hard and you need to step a bit more lightly.
Securing Parts
There are three parts that constantly loosen on my Blackbird that need to be secured.
- Tighten the gimbal to the stage. When I do pan motion or hold the Blackbird between takes I tend to hold it by the neck of the gimbal that attaches to the stage. This tends to unscrew it thus changing the height of the balance point.
- The lower fastening screw on the T-bar tends to loosen especially after the bar hits something. Make sure it's tight after picking it back up to use.
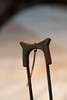
- The rubber shoe on the resting stand comes off. Secure it with a tie down.
Sample Flights for Reference
I wouldn't call these examples of a perfectly balanced rig but the footage is usable.
Indoors, walking, shot in 24fps
Outdoors, running and walking, shot in 60fps, slowed down to 24fps
Tuesday, June 15, 2010
Editing Canon 7D with Blender 3D
So I went on a trip without my editing rig. No way was I lugging a quad-core desktop on my trip. Instead I'll do rough cuts on the field with whatever machine I can borrow. Unfortunately I had my Vegas and Cineform license information was locked away on a powered-off hard drive half the world away. Windows Movie Maker wasn't going to cut it. In comes Blender 2.49 and Super(C) to tide me over. My purpose was to do rough cuts to see if I had enough footage.
The Super(C) is free software that will let you downgrade the high-bit rate H264 video from the 7D to AVI format with a codec of your choosing. I selected and IPod-like format: MP4 with 6Mbit in AVI format at 480x272.
Tutorial on how to use Blender as an NLE
http://screencasters.heathenx.org/_misc/bve/bve_01.html
Switch to Sequence Editor
-> (upper bar) SR:4-Sequence (default is SR:2 - Model)
Set Clip settings
-> Format (lower right) -> change to whatever size you want to edit (there are presets like HD and FULL on the right) -> FPS: (change to 24, 25, 50 or 60)
Load a video
-> (middle-timeline window) -> use scroll wheel to unzoom the timeline (timeline is in frames) Shift-A -> Movie+Audio (HD -- stands for Hard Drive not High Definition) -> Search for your clip on the hard drive -> Drag the icon to the frame marker you want -> Audio track is above Video, may not synch if FPS is wrong
Undo a grab or any operation
Esc(ape)
Grab video (to move clip around)
Shift/Right-Click (to select track),G -> drag the clip around -> the left side is the leading frame count
Cut a clip
Use arrow keys or left-mouse button to scrub the green vertical bar to scrub to the point you want to cut -> Shift/Right-Click (to select video track) -> Point to right-facing arrow at beginning to track (or left-facing if cutting from end of clip) -> G -> Drag left or right to the green vertical bar you previously set -> Left-click to set
Cross-Fade Transition
Right-Click (to select track) first video that is the start of transition -> Hold down Shift -> Right-Click (to select track) of second video -> Shift-A -> Gamma Cross -> drag the gamma cross transition to a track number above the two clips
Change Last Frame
The third window down defaults to 256 (frames), change this to the number indicated on the last clip on your timeline so you can display the entire movie
Save Project
File -> Save -> Navigate to directory you want -> rename untitled.blend to any name you want -> Save As
Output to Movie
Change Q (Quality) from 90 to 100, Change format from JPEG to FFMPeg (or whatever format you want) -> Video -> Choose the Codec (MPEG-2 by default, H264 is available) -> Audio -> Downsample Mix -> Output: Change the output directory from /tmp to wherever -> Do Sequence -> ANIM -> Wait for the Animation to finish
Take note how I use the word Animate. There is a Render button in Blender. It serves a different purpose from our normal NLE nomenclature. In Sony Vegas we say Render. In Blender it is ANIM(ate).
The Super(C) is free software that will let you downgrade the high-bit rate H264 video from the 7D to AVI format with a codec of your choosing. I selected and IPod-like format: MP4 with 6Mbit in AVI format at 480x272.
Tutorial on how to use Blender as an NLE
http://screencasters.heathenx.org/_misc/bve/bve_01.html
Switch to Sequence Editor
-> (upper bar) SR:4-Sequence (default is SR:2 - Model)
Set Clip settings
-> Format (lower right) -> change to whatever size you want to edit (there are presets like HD and FULL on the right) -> FPS: (change to 24, 25, 50 or 60)
Load a video
-> (middle-timeline window) -> use scroll wheel to unzoom the timeline (timeline is in frames) Shift-A -> Movie+Audio (HD -- stands for Hard Drive not High Definition) -> Search for your clip on the hard drive -> Drag the icon to the frame marker you want -> Audio track is above Video, may not synch if FPS is wrong
Undo a grab or any operation
Esc(ape)
Grab video (to move clip around)
Shift/Right-Click (to select track),G -> drag the clip around -> the left side is the leading frame count
Cut a clip
Use arrow keys or left-mouse button to scrub the green vertical bar to scrub to the point you want to cut -> Shift/Right-Click (to select video track) -> Point to right-facing arrow at beginning to track (or left-facing if cutting from end of clip) -> G -> Drag left or right to the green vertical bar you previously set -> Left-click to set
Cross-Fade Transition
Right-Click (to select track) first video that is the start of transition -> Hold down Shift -> Right-Click (to select track) of second video -> Shift-A -> Gamma Cross -> drag the gamma cross transition to a track number above the two clips
Change Last Frame
The third window down defaults to 256 (frames), change this to the number indicated on the last clip on your timeline so you can display the entire movie
Save Project
File -> Save -> Navigate to directory you want -> rename untitled.blend to any name you want -> Save As
Output to Movie
Change Q (Quality) from 90 to 100, Change format from JPEG to FFMPeg (or whatever format you want) -> Video -> Choose the Codec (MPEG-2 by default, H264 is available) -> Audio -> Downsample Mix -> Output: Change the output directory from /tmp to wherever -> Do Sequence -> ANIM -> Wait for the Animation to finish
Take note how I use the word Animate. There is a Render button in Blender. It serves a different purpose from our normal NLE nomenclature. In Sony Vegas we say Render. In Blender it is ANIM(ate).
Thursday, April 29, 2010
Behaviors of SLR Lenses on Canon APS-C
 Field of View
Comparison of the field of view you get at various focal lengths and lenses. It's easier to visualize with pictures. The camera is a Canon Rebel T2i (aka 550D) which has an APS-C sensor (1.6 crop factor). Camera is tripod mounted while lenses are changed. Sorry, I forgot to take "normal" range photos with the zoom. I'll do a second set of tests for that. These still images are at 4:3 Aspect Ratio. Video mode will crop the top and bottom to form a 16:9 image.
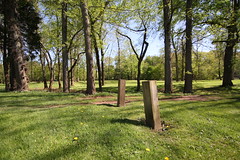
Tokina 11-16 AT-X Pro 2.8 (Zoom)
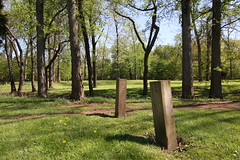
Tokina 11-16 AT-X Pro 2.8 (Zoom)
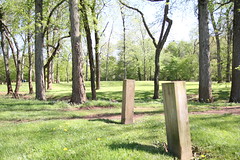
Sigma 18-50 EX DC Macro 2.8 (Zoom)
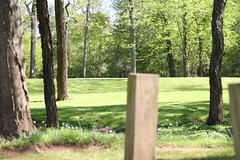
Sigma 18-50 EX DC Macro 2.8 (Zoom)
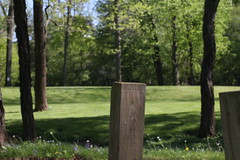
Nikkor SC 50mm 1.4 (Prime), adapted from F-mount to EF
Note how the view is narrower than the Sigma above. Infinity focus is slightly before the infinity marker on the lens.

Canon EF 70-200 F2.8/L IS (Zoom)

Canon EF 85mm 1.8 (Prime)

Canon EF 70-200 F2.8/L IS (Zoom)
Focus Breathing
A slight change of FOV may be observed when changing focus. All the SLR lenses from the previous test exhibit this to some degree.
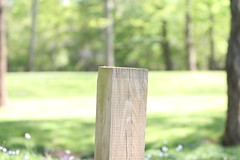
Note the trees on either side of the picture. Focus to foreground which is about 9 feet away shows less of trees on either side. Lens is a Canon EF 70-200 F2.8/L IS at 70mm.
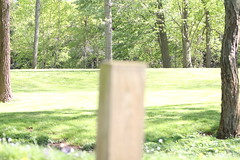
Focus to background shows more of the trees on either side. Lens is a Canon EF 70-200 F2.8/L IS at 70mm.
Lenses Tested
Tokina 11-16MM F/2.8 ATX 116 Lens for Canon EOS AF Digital - Tokina ATX116PRODXC (paid link)
Sigma 18-50mm f/2.8 EX DC SLD ELD Aspherical Macro Lens for Canon Digital SLR Cameras (paid link)

Canon EF 85mm f/1.8 USM Medium Telephoto Lens for Canon SLR Cameras (paid link)

Canon EF 70-200mm f/2.8L IS USM Telephoto Zoom Lens for Canon SLR Cameras (paid link)

Canon 7D vs T2i Video Mode Controls
The controls behave differently between stills and video mode. This is for video mode.
Switch to Video Mode
T2i
Turn mode dial to movie icon. Message appears if adapted lens is attached. Mirror locks up, LCD or external monitor turns on. Push Live View button on camera's back to record. Red circle appears in upper right when recording.
7D
Push throw switch left to movie icon on camera's back. Message appears if adapted lens is attached. Mirror locks up, LCD or external monitor turns on. Press Start/Stop button to record. Red circle appears in upper right when recording.
Changing Video Shutter Speed
T2i
Turn wheel near shutter button right to increase shutter speed. Recommended shutter speed is 50 (1/50) for 24fps, 60 (1/60) for 30fps, and 120 (1/120) for 60fps. This is to conform to 180-degree shutter rule.
7D
Turn wheel near shutter button right to increase shutter speed. Recommended shutter speed is 50 (1/50) for 24fps, 60 (1/60) for 30fps, and 120 (1/120) for 60fps. This is to conform to 180-degree shutter rule.
Changing Aperture of EF Lenses
T2i
Hold down AV button near LCD. Turn wheel near shutter button right to increase F-stop (darker). Turn left to decrease F-stop (brighter).
7D
Turn body dial right to increase F-stop. Turn body dial clockwise to increase F-stop (darker). Turn counter-clockwise to decrease F-stop (brighter)
Changing ISO (boost brightness)
T2i
Press ISO button once near shutter button. Turn wheel near shutter right to move from Auto ISO, 100, 200 ... 6400 (default, extended ISO turned off). LCD displays ISO value in lower right corner. Selection wraps around.
100-400 ISO typical for daylight. 1600 indoors starts to show image noise. Default Max setting is 3200 for Auto ISO.
7D
Press ISO button once near shutter button. M-Fn wheel near shutter right to move from Auto ISO, 100, 125, 160, 200, 250 ... 6400 (default, extended ISO turned off). LCD displays ISO values. Selection wraps around.
100-400 ISO typical for daylight. 1600 indoors starts to show image noise. Max gain in Auto ISO feature is not available on 7D. Maximum Auto ISO is 6400 when high mode is not enabled.
Switch to Video Mode
T2i
Turn mode dial to movie icon. Message appears if adapted lens is attached. Mirror locks up, LCD or external monitor turns on. Push Live View button on camera's back to record. Red circle appears in upper right when recording.
7D
Push throw switch left to movie icon on camera's back. Message appears if adapted lens is attached. Mirror locks up, LCD or external monitor turns on. Press Start/Stop button to record. Red circle appears in upper right when recording.
Changing Video Shutter Speed
T2i
Turn wheel near shutter button right to increase shutter speed. Recommended shutter speed is 50 (1/50) for 24fps, 60 (1/60) for 30fps, and 120 (1/120) for 60fps. This is to conform to 180-degree shutter rule.
7D
Turn wheel near shutter button right to increase shutter speed. Recommended shutter speed is 50 (1/50) for 24fps, 60 (1/60) for 30fps, and 120 (1/120) for 60fps. This is to conform to 180-degree shutter rule.
Changing Aperture of EF Lenses
T2i
Hold down AV button near LCD. Turn wheel near shutter button right to increase F-stop (darker). Turn left to decrease F-stop (brighter).
7D
Turn body dial right to increase F-stop. Turn body dial clockwise to increase F-stop (darker). Turn counter-clockwise to decrease F-stop (brighter)
Changing ISO (boost brightness)
T2i
Press ISO button once near shutter button. Turn wheel near shutter right to move from Auto ISO, 100, 200 ... 6400 (default, extended ISO turned off). LCD displays ISO value in lower right corner. Selection wraps around.
100-400 ISO typical for daylight. 1600 indoors starts to show image noise. Default Max setting is 3200 for Auto ISO.
7D
Press ISO button once near shutter button. M-Fn wheel near shutter right to move from Auto ISO, 100, 125, 160, 200, 250 ... 6400 (default, extended ISO turned off). LCD displays ISO values. Selection wraps around.
100-400 ISO typical for daylight. 1600 indoors starts to show image noise. Max gain in Auto ISO feature is not available on 7D. Maximum Auto ISO is 6400 when high mode is not enabled.
Saturday, April 10, 2010
GoPro HD Hero nuts
The HD Helmet Hero doesn't have a nut to go with every mount. My Google searches misled me at first. 10-32 is NOT the correct size. It's Metric 5mm. At Home Depot you can find it in the red trays marked Hex Nut 4-12mm size. You want the one marked HEX NUT 5mm-8 which contains 2 pieces. It was $0.41 + tax at the time of this post.
Subscribe to:
Posts (Atom)