Showing posts with label aldu35. Show all posts

Sunday, May 11, 2008

Vibrating 35mm DOF adapter completed

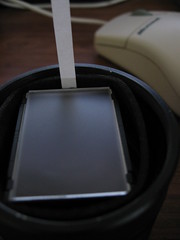
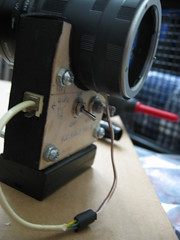
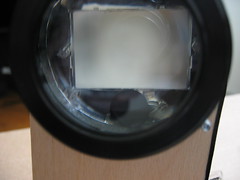
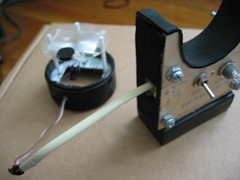
After almost a year I get back to completing my vibrating adapter. This time I switched the ground glass from the Nikon F3 Type D to a Canon Ee-A focus screen. I made a holder out of three syringe plungers, a key card, and the lid from a can of pringles chips. I kid you not, it's that ghetto. But it works. The pancake motor and motor controls are reused from the previous attempt. The assembly seems to work well.


Parts Currently Used
1 Canon Ee-A focus screen (Canon USA Part#YN2-3558-000)
1 "Asian" Macro Extension Tube with Nikon Mount (ebay)
2 58mm Filters (ebay)
1 58mm Bower +10 Singlet Macro (ebay)
1 Lid from a Pringles can (corner store-any flavor!)
1 Key card (in my pocket-any flat plastic will do)
3 Syringe plungers (generous individual)
1 43-55 Step-Up ring (ebay)
1 55-58 Step-Up ring (ebay)
1 2xAA Battery Holder (Radioshack)
2 AA Batteries (supermarket)
1 40-ohm Rheostat (radioshack)
1 2-way flip switch (radioshack)
1 splice of wire (old CAT5 works)
1 RG-45 connector (from an old telephone)
1 RG-45 socket (from a DSL suppressor)
4 machine screws (Home Depot)
12 machine nuts (Home Depot)
1 plank of plywood (Michael's craft store)

Tools Used
1 two-part epoxy (for asian tube to 58mm)
1 Dremel (for cutting the holder)
1 Carbide tip (for cutting the holder)
1 Drill with various small drillbits
1 Boxcutter
1 Scissors
1 Soldering Iron
1 spool of Solder wire
1 nail clipper
1 magnifying lens
2 rulers
1 mechanical pencil
1 hot-glue gun
1 roll of electrical tape
1 packet of heat shrink tubing


I'll have to explain the build and post sample footage in a later post. It's going to be a long story. And be careful when trying to source those syringe plungers. Apparently some states won't let you buy them without a prescription. I tried getting it over the counter once and I was given odd looks. I forget that insulin syringes might also be used for other drug applications thus these could be regulated where you live. There are alternatives such as nylon screws or carbon fiber wires.

Tuesday, April 17, 2007

Static Adapter Version 2

I broke my vibrating motor while disassembling it from the 52mm tube. I had constructed a ground glass holder by cutting up a plastic key card and slipping it into an empty 52mm filter ring. Mounted backwards it mated with a 52mm-to-52mm macro coupler. Unfortunately it didn't work because there wasn't enough play to vibrate the ground glass. Incidentally, the test tape was somehow lost as I changed tapes. And later I had an accident that broke one of the small gauge wires on the motor. I get knocked down, but i get up again.

So I took the 52mm filter plus mount I made for the failed vibrating experiment and moved it to the 57mm. Incidentally a 52mm filter fits snug in that macro tube so it was easy to position and get to the right distance. Add a +10 singlet macro and some step down and I was in business. This was also the perfect chance to try my brand spanking new camcorder.


Say hello to the Canon HV20. It's a small HDV camcorder with a progressive CMOS sensor. The little wonder reminds me of my Canon Elura which was one of few early MiniDV with a progressive CCD. Against all advise, I hooked up my Static Adapter to both the ZR200 and HV20. Their resolution and light gathering abilities are different. I just wanted to see how bad the grain could be with this unit. One other thing changed on the V2, I have a +10 singlet close-up macro (not an achromat). The shot was done indoors on a cloudy day.


Lens: 50mm Nikon Series E f/1.8
DOF Adaptor: YouSillyMan35 v2 Static, Nikon F3 Type D
Camera: Canon HV20, 1/2.7" Single CMOS progressive
Original Mode: HDV24PF, TV-48
Recompression: WMV9 1920x1080 30fps progressive, 6Mbps
File Size: 71.24MB
http://www.megaupload.com/?d=9G3EUNE5

Lens: 50mm Nikon Series E f/1.8
DOF Adaptor: YouSillyMan35 v2 Static, Nikon F3 Type D
Camera: Canon ZR600, 1/6" Single CCD interlaced
Original Mode: DV interlaced, automatic
Recompression: WMV9 720x480 29.97fps interlaced, 4Mbps
File Size: 45.84MB
http://www.megaupload.com/?d=3N8MNZ2B

Saturday, April 14, 2007

How not to do a Vibrating Ground Glass

The static is fine for web videos but leaves much to be desired for full DV. At low light like indoors shooting the grain shows up around the edges. So I try to convert the simple static to a full vibrating ground glass. Unfortunately I am not successful yet.


Notice something wrong? The adapter was a full centimeter short! One of the spacers is too short. This wreaked havoc with the infinity focus.


I started with the 52mm tube and cutout a plastic card. I carefully cut a rectangle the size of the Nikon Type D for mounting the ground glass. I tried it alone inside of the tube as a static but it wasn't stable. So I try using a 52mm filter in reverse and that held the ground glass well. Trial fitting the motor I found that there wasn't much room to mount it vertically as it should. So just for kicks I try it horizontal. It doesn't work.


Not one to give up, I sacrifice some of the focus screen's visible area by mounting the motor vertically against the fastening tab on the Nikon Type D. The vibrations are more quiet but I can't see the grain moving. There isn't enough play in the rectangular cutout nor the plastic card to allow the grains to move.

I ask the kind folks at DVInfo Alternative Imaging what kind of stupidity I've delved into and I'm told that my arrangement wouldn't work. The horizontal was moving in the wrong direction. It was also loud because it was turning the card into a diaphragm. Meanwhile my vertical was too tight on the tube to allow the movement necessary to blur the grain. Just for kicks I'm taking the vertical setup to the seaport for some test shots.

Friday, April 6, 2007

Other ways of aligning the Groundglass


When using a paper strip make sure it's stiff enough to stand


Use a toothpick or a strip of paper marked with 46.5mm to adjust the distance of the ground glass.

Wednesday, April 4, 2007

Limitations of The Static Adapter

Besides the grain, the other thing you will notice immediately with a static adapter is how much cleaning you have to do. Even very small pieces of lint or dust can ruin your image if it lands on either the ground glass or condenser. I made the mistake of using the pad end of a lenspen to clean the ground glass and now there is this little black spec embedded in one of the very small pits. Use air, brush, and microfiber cloth to clean your groundglass.


The dust speck is on the lower left quadrant when rotated 180 degrees. Two more fibers of lint next to it which got muddled by YouTube's compression.

The static adapter is small and light. But the attached lens isn't. I'm using a Non-AI 50mm Nikkon S-C which is about as heavy as the entire camcorder. It must be conceded that the ZR200 is a featherweight as camcorders go, but that totally makes balance different. Learning to frame and hold the image takes a bit of practice. And did I mention that the camcorder's image stabilization won't help you because the SLR lens is doing the work? Live and learn. But it's fun. While taking this video a passerby asked me "Is that a camera or video? How much does it cost?" My answer, "I just put it together myself."

Saturday, March 24, 2007

Outdoor Test with the Static

The static showed its grain when used outdoor with iris at full open.


When the static is complete it needs to have all the openings sealed from light and dust. A brace also needs to be made as the camcorder's threads probably can't carry the weight of the lens assembly.

Friday, March 23, 2007

Making and Testing the Static

This was a really simple build with better results than the spinner that is still half finished. I can't take that much credit for it. I think the condenser on the Nikon Type D has a lot to do with it.

Parts
  • Nikon Lens
  • Nikon Macro extension tube
  • Nikon F3 Type D Focus Screen
  • Reverse Macro coupler for tube (for later)
  • Step-up adapter for camcorder (for later)
  • Art Foam

Tools
  • Ruler
  • Boxcutter
  • Lenspen


I took the macro tube and stacked it with 1, 2, 3. In ring number 3 I put a ring of art foam to cover the space. Then another layer of art foam was wrapped around the focus screen so pushing it in braced the screen into the tube. With this macro tube stacked this way, the edge of the ring threads comes to about 46.5mm! Simple as that. Hook up your choice of Nikon lenses and setup the camcorder. Zoom in and press record.


Cheated a bit. I ordered the wrong macro tube so the thread was female rather than male. And its ring was 52mm female threaded rather than 58mm male threaded. So I'll need a macro reverse coupler and a step-up ring to hookup to the camcorder

The video was extracted from DV and then rotated 180 degrees. It was recompressed with ffdshow to fit in youtube size. The static grain isn't as obvious because of the downscaling (720x480 16:9 to 360x240 4:3). The washed out colors has more to do with the shooting environment and the single CCD camera. It was shot indoors during a rainy day.

Thursday, March 22, 2007

Macro might not be needed afterall

I am being silly again. Testing the ZR200 with various zoom settings and manual focus proved that the 28mm lens on the camcorder is able to focus on objects very closely. The trick was to have something with good contrast in front of the ground glass while adjusting the zoom and focus.

No Achromat Just Yet

The seller for my binoculars ran out of stock. Might as well, I just learned that there is some color casting from those front lenses. Sourgrapes? Probably. On a brighter note, I have some parts coming in for the second prototype which will be a static/vibrating gg based around a Nikon F3 Type D focus screen.


This focus screen is thicker than the Canon Ee-A that other builders use because it has a built in condenser. The condenser is a plano-convex (PCX) lens that magnifies the amount of light that goes to the focus screen. That's a lot of big words! Not that I know a lot about optics, I'm still learning what it all means. I should explain it some more on this blog as each concept is understood by me. But the PCX simply means that the image that gets on the focus screen is brighter. More light to the focus screen makes it easier for the camcorder to record an image.

The Type D focus screen is, incidentally, a favorite for astrophotography. And it is supposedly has such a fine grain that it could be used static. The static design is based roughly on the aldu35. This was a parallel development for the spinning agus35. The aldu35 was later improved by having the gg vibrate to blur the grain.

All this talk is making me anxious. I sure hope that +10 Macro comes in soon so I can have prototype 1 working.